Setting up a movie-night-worthy living room can feel impossible when you price out TVs, speakers, and streaming boxes. Trevor and I have been there—staring at a cart full of gear and wondering what actually matters versus what’s just marketing. The good news: you can set up a home theater on a budget without settling for tinny sound or a dim, washed-out picture. You just need to spend in the right places and avoid the common traps.
Disclaimer: As an Amazon Associate, TrevMart earns from qualifying purchases at no extra cost to you.
What “Budget Home Theater” Really Means (and What It Doesn’t)
A budget home theater isn’t about buying the cheapest thing in every category. It’s about getting the biggest jump in immersion per dollar.
For most rooms, the best ROI comes from (1) screen size/quality, (2) audio clarity, and (3) simple, reliable sources. Fancy receivers, 11 speakers, and premium cables can wait.
Choose Your Target Budget Tier
- $300–$600: Solid TV upgrade + entry soundbar (biggest “wow” for most people).
- $600–$1,000: Better TV or projector + soundbar with subwoofer, or a 2.0/2.1 speaker setup.
- $1,000–$1,500: Noticeably stronger audio (AVR + 2.1/3.1) and/or a larger screen.
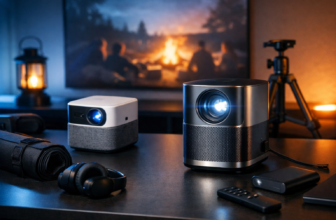
Step 1: Pick the Right Display for Your Room
Your display dictates how cinematic the setup feels. But the “best” choice depends on lighting, seating distance, and whether you want a giant image.
TV vs Projector: The Budget Sweet Spot
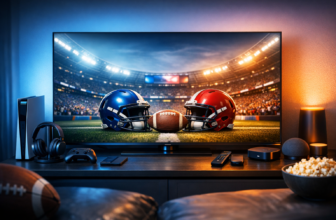
Choose a TV if you watch with lights on, sports during the day, or want the simplest setup. Modern 4K TVs deliver great brightness and contrast for the money.
Choose a projector if you want the biggest image possible and can control light. A projector can feel like a real theater fast—but it demands a darker room.
Budget TV Buying Checklist
- Size first: A bigger screen usually beats slightly better specs for immersion.
- 4K resolution: Helps sharpness and upscaling for streaming content.
- HDR support: Better highlights and color—when paired with decent brightness.
- HDMI ports (at least 3): So you don’t shuffle cables every time you add a device.
- Game mode / low lag: If you play on console, it keeps controls responsive.
Budget Projector Buying Checklist
- Real brightness matters: Look for strong brightness ratings and real-world reviews.
- 1080p can be enough: At huge sizes, good 1080p still looks excellent for movies.
- Throw distance: Make sure it can hit your desired screen size from your available placement.
- Keystone vs placement: Better placement beats heavy digital keystone (which can soften the image).
Step 2: Fix the Biggest Problem—TV Speakers
Even a great TV can sound flat. Thin TVs can’t move enough air for real bass, and dialog can get buried.
On a budget, audio upgrades bring the biggest “I can’t go back” reaction.
Option A: Soundbar (Fastest Win)
A soundbar takes minutes to install and immediately improves dialog and overall fullness. Many bundles include a wireless subwoofer, which adds the punch you feel during action scenes.
- Pros: Easy setup, clean look, better dialog, good value bundles.
- Cons: Limited stereo separation compared to separate speakers, “virtual surround” varies.
Option B: 2.0 or 2.1 Speakers (Best Sound per Dollar)
If you can handle a little wiring and a small amp/receiver, a pair of bookshelf speakers can outperform most cheap soundbars. Add a sub later for a 2.1 setup that hits hard.
- Pros: Clearer stereo imaging, upgradeable over time, great for music too.
- Cons: More components, more placement considerations.
Option C: AVR + 3.1 (Best Dialog Upgrade)
When dialog is your main pain point, a center channel in a 3.1 setup is a game changer. You’ll pay more up front, but voices become easier to hear without cranking the volume.
Step 3: Get the Right Streaming Source (Don’t Rely on Slow Built-Ins)
Smart TV apps can be fine, but they often get sluggish and stop receiving updates. A dedicated streaming device keeps things fast and consistent.
What to Look For
- 4K HDR support: So you’re not limiting picture quality.
- Snappy performance: Faster menus and fewer app crashes.
- Wi-Fi stability: Less buffering means fewer interruptions mid-movie.
Step 4: Cable Basics That Won’t Waste Your Money
You don’t need overpriced “audiophile” HDMI cables. You do need the right spec so you’re not stuck troubleshooting flicker or audio dropouts.
Minimum Cable Rules
- HDMI (for 4K HDR): Use a certified high-speed HDMI cable, especially for longer runs.
- Optical vs HDMI eARC: HDMI eARC is simpler for best audio formats; optical is fine for basic setups.
- Speaker wire: Affordable copper wire works great—spend on speakers, not the wire.
Step 5: Placement and Settings—Free Upgrades Most People Skip
Before you buy anything else, optimize what you already own. A few changes can make your setup feel twice as expensive.
Quick Placement Wins
- TV height: Aim for eye level near the middle of the screen when seated.
- Soundbar position: Keep it near the front edge of the TV stand so sound isn’t blocked.
- Subwoofer placement: Start near the front wall; adjust to reduce boominess.
- Seating distance: Sitting a bit closer can create a bigger perceived screen without spending a dime.
Settings That Improve Picture Fast
- Turn off “Vivid” mode: It often crushes detail and exaggerates colors.
- Use Movie/Cinema mode: More natural color and better shadow detail.
- Motion smoothing: Disable it for movies if you hate the “soap opera” look.
Martin’s Take: If your budget is tight, spend your first dollars on clear dialog. That usually means a soundbar with a dedicated center channel mode or a 3.0/3.1 setup. A huge screen is fun, but if you’re constantly rewinding to catch what someone said, movie night turns into “subtitles night.”
Best Budget Upgrade Paths (So You Don’t Rebuy Everything)
The smartest budget builds scale over time. Here are three paths Trevor and I recommend depending on your priorities.
Path 1: “Instant Upgrade” (TV + Soundbar)
- Buy the biggest TV you can afford from a reputable brand line.
- Add a soundbar (ideally with a subwoofer) for real low-end impact.
- Optional next step: add rear surrounds if your soundbar supports them.
Path 2: “Sound First” (2.0 Now, Sub Later)
- Start with bookshelf speakers and a compact amp/receiver.
- Upgrade to a subwoofer when the budget allows for deeper bass.
- Optional next step: add a center channel for clearer dialog.
Path 3: “Good Bones” (AVR + 3.1)
- Begin with left/right speakers + a center + subwoofer.
- Use an AVR so you can expand to 5.1 later without replacing core gear.
- Optional next step: add surrounds when you’re ready.
Common Budget Home Theater Mistakes (and How to Avoid Them)
- Overspending on the TV and ignoring audio: A $900 TV with bad sound feels cheaper than a $650 TV with solid speakers.
- Buying “surround” speakers that can’t fill the room: Better to have fewer, stronger speakers than many weak ones.
- Ignoring room light: Daylight can ruin projector performance and make any screen look dull.
- Messy cable management: A few simple ties and routing makes the setup easier to live with.
Final Verdict: A Great Home Theater Doesn’t Need a Huge Budget
If you want the most impact for the least money, start with the biggest screen that fits your room, then fix the audio with a soundbar or a basic 2.0/2.1 speaker setup. After that, a dedicated streaming device and a few placement tweaks will make everything feel smoother and more premium.
What’s your biggest goal for your setup—louder, clearer dialog, deeper bass, or a bigger screen size? Tell us your budget and room size in the comments and we’ll point you toward a smart upgrade path.